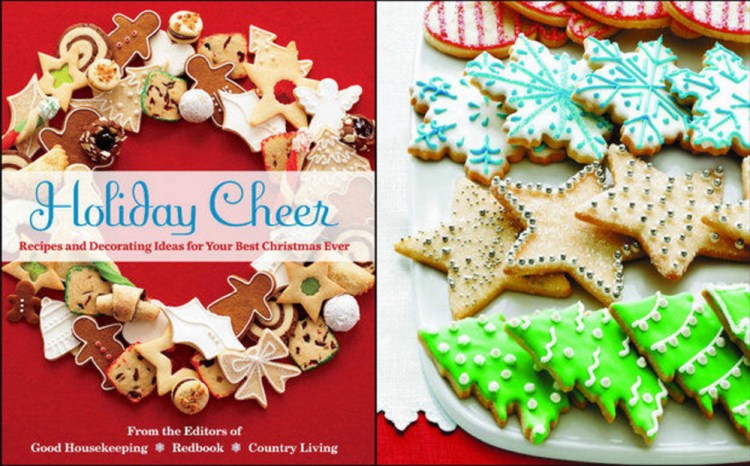
This enticing hardcover is more than a cookbook. In addition to recipes for dinners, desserts and cookies, “Holiday Cheer” offers attractive ideas for decorating and gift-making. Being in craft mode brought on by the approaching holidays, my daughter Lily and I were drawn to these sections of the book. From simple ribbon and paper decorations to more elaborate wreath-making, there is something for everyone, no matter her artistic ability.
The decoration section has many inventive ideas with a “go green” theme. These range from tin molds and cookie cutters repurposed as ornaments, to using cloth remnants and old cards for making decorations.
There also are a few instructions on making tree ornaments from apples, oranges and cookies. While I can appreciate the idea of eco-friendly crafts, it struck even 13-year-old Lily as impractical, if not wasteful. Perhaps it would work in some households, but we couldn’t help but think of our own experience with the Christmas tree toppling over as our dog lunged for a non-edible ornament she thought interesting. I can only imagine the disaster if we had real food hanging from the tree.
Still, overall, it is encouraging in this season of over-consumption to find suggestions for using common and often discarded materials to make decorations.
The gorgeous photographs alone are inspiring.
The recipes are sandwiched between the decoration and gift sections. Choosing just one recipe was tough. With kids involved in the selection process, I figured it wasn’t going to be my choice of Apple Cider Braised Greens. The vote came down to a cookie recipe and we compromised with a cookie that has adult appeal: Chocolate-Filled Biscotti. The kids renamed it “uniscotti” since the recipe called for only a single bake.
I read through the recipe several times to be sure I hadn’t missed something, but it seems that this recipe, unlike the two other biscotti recipes in the book, does get baked only once. For anxious cookie testers, this worked out well. The dough had a velvety texture, so rolled out easily. The single bake and chocolate filling kept the cookies from getting as hard as the typical biscotti. They also were smaller.
Both differences were fine – we actually preferred these. This tasty uniscotti from “Holiday Cheer” is now an elegant addition to our Christmas cookie gift plates.
Chocolate-Filled Biscotti
Yield: 96 cookies
Cream cheese dough:
4 cups all-purpose flour
1 teaspoon baking powder
1 teaspoon salt
1 cup butter, softened
6 ounces cream cheese, softened
1 cup granulated sugar
1 cup brown sugar
2 large eggs
1 tablespoon vanilla extract
Chocolate filling:
1 can (14 ounces) sweetened condensed milk
8 ounces bittersweet or semisweet chocolate
1 cup walnuts, coarsely chopped
Powdered sugar for sprinkling
To make the cream cheese dough, combine the flour, baking powder and salt in a medium bowl. In the large bowl of a mixer, with the mixer on medium speed, beat the butter and cream cheese until well blended. Gradually add the sugars and beat 3 minutes. Add eggs, one at a time, beating well after each addition. Beat in the vanilla. Reduce speed to low and gradually beat in flour mixture just until blended.
Place 3/4 cup of dough on sheet of plastic wrap; repeat to make 7 more. Wrap each and refrigerate overnight or for several hours.
To make the chocolate filling, heat the sweetened condensed milk and chocolate in a 2-quart saucepan over medium heat until the chocolate melts, stirring frequently. Remove the pan from the heat and stir in walnuts. Let cool to room temperature.
Preheat the oven to 350 degrees F. Grease 2 large cookie sheets.
Remove 1 piece of dough from refrigerator at a time. On a lightly floured 16-inch sheet of waxed paper, with floured rolling pin, roll the dough into a 10- x 6-inch rectangle.
Spread a heaping 1/4 cup of filling lengthwise down the center of the rectangle. Using waxed paper to help lift dough, fold one side of dough lengthwise over filling, then remaining side over dough, overlapping.
Pick up the waxed paper and flip the cookie log onto the cookie sheet, seam side down. Repeat process with another piece of dough and filling, leaving about 2 inches between the logs on a cookie sheet.
Bake the logs 20 to 22 minutes or until edges are lightly golden. Cool logs on the cookie sheet about 2 minutes, then transfer to wire rack to cool completely. Continue until you’ve used up the dough.
Cooled logs can be wrapped and stored in tightly covered containers at room temperature for up to 2 weeks or in the freezer up to 3 months. To serve, sprinkle each log with powdered sugar.
Cut each log crosswise on the diagonal into 12 slices.
Send questions/comments to the editors.


Comments are no longer available on this story