Surely, all home chefs have experienced a kitchen catastrophe so great they will likely never revisit the recipe in fear of evoking those jarring feelings of defeat. For me, that dreadful recipe was a tiny French cookie that so destroyed my culinary confidence, I vowed to never tell a soul of my failure. Until now.
Success in the kitchen has always come quite naturally to me. With fond memories of family recipes, cooking is a therapeutic hobby. If I’m feeling unimpressive, I take to the kitchen, and in 20 minutes I’m feeling as accomplished as Fannie Farmer. However, I always have more fun than Fannie.
Improvisation with ingredients suited me more than Farmer’s penchant for exact measurements. Who can be bothered with systematic use of cups and spoons when everyone in your kitchen is drooling from anticipation of your banana bread with tangy lemon cream cheese frosting?
For years, modifying recipes with nary a glance at the adorable porcelain kitty cat measuring cups that my sister gave me one Christmas had worked for me. As much as I enjoyed the baking process, I was more concerned with making a recipe my own and racing to feed my fans, because the flattery that followed tasted so good.
But my rebel chef swagger was challenged when I met the macaron, the tiny French cookie sandwich that appears deceivingly carefree in its delightful pastel colors and creamy fillings but has a wicked reputation for being difficult to make.
A few years ago, in the midst of a surge in macaron popularity, I turned to my prized book, “Baking” by James Peterson, for a recipe. Skipping over all of the textbooky hoopla, I looked at the ingredients: “What’s so hard about whipping together sugar and egg whites?” I thought. Little did I know how crucial was this seemingly simple task.
My first attempt, involving a smoky oven and someone else’s confusion of wax paper for parchment, shan’t be detailed here. But it wasn’t enough for me to refuse to try again. Attempt No. 2 was just as tragic.
That second time, I hastily whipped the meringue, taking great care in crafting the perfect color batter. The additional food coloring may have caused it to be a bit runny, but never mind that. The color, Purple Mountains’ Majesty, was impeccable. I gingerly squeezed each shell into little half-dollar-size circles on the parchment. I smiled at them, and, as they gleamed back at me, I placed them into the oven. This would be the last time I would see my precious cookies whole.
As I was fitting a bag with a pastry tip to pipe the filling, I heard a strange sizzling in the oven. It was the batter, melting from the pan and dripping onto the bottom of the oven. Three open windows, one fight with the smoke detector and several dirty dish towels later, I hung up my apron, closed my “Baking” book and promised to never revisit that page, or any macaron recipe, ever again.
So when my editor gave me a stack of new macaron books recently and inquired about my interest in doing a story, I was conflicted. Cramming my baking bravado directly down the garbage disposal seemed less excruciating than attempting the macaron a third time. But the books kept appearing on my desk, including “Perfect Patisserie: Mastering Macarons, Madeleines and More” by Tim Kinnaird (Firefly Books) and “Bake it, Don’t Fake it!” by Heather Bertinetti (Rachael Ray Books). Even the March issue of Martha Stewart Living featured a crash course in macarons. Apparently, macarons are back again, or maybe they never left.
After weeks of staring at the covers with those glossy meringue biscuits oozing with ganaches and butter creams, I decided I was not going to be defeated by these pretentious, dastardly French confections.
I signed up for a class, “Being a Chef: Le Macaron with Madelaine Bullwinkel,” at Alliance Francaise de Chicago. The entire way there I had flashbacks of cleaning perfect purple goo from the bottom of my oven. But I pulled up my big-girl baking pants for the cookie cause and proceeded into the class.
Bullwinkel, who’s been teaching French cuisine at Chez Madelaine cooking school for nearly four decades, learned this macaron recipe from Paris’ Lenotre cooking school and tea house on the Champs-Elysees. The macaron is said to have been introduced to France in the 16th century by Catherine de’ Medici, an Italian noblewoman and queen to King Henry II.
“Anything devised by the Italians in the 16th century should be a snap today, right? They didn’t have (modern) ovens, they didn’t have any of our tools,” Bullwinkel said at the introduction of class.
“We are so advanced, we should be able to do this. Wrong. We are also arrogant with our technology, and we think that, with machines, we can do anything. And we can do a lot, but the macaron is very trying. In fact, we are going to do it in an exacting way to get the best results.”
Exacting. There’s that word again. But I wrote it down and underlined it, taking very diligent notes throughout her demonstration, during which Bullwinkel warned, “Taking shortcuts is only something you can do when you’ve mastered it.” And not even she takes shortcuts.
After her show-and-tell, she turned us loose to try it on our own in groups. Some steps were intimidating, but seeing the appropriate consistency of the meringue and watching Bullwinkel’s piping technique were the most valuable takeaways. The rest is just science, as my group mate Ben Andrew, a chemist, put it.
“Chemistry is cooking; it’s not intimidating that way,” he said. “And, actually, I’m happier when we’re measuring things, because it’s more precise. There’s a lot of ways to screw it up.”
Patience proved to be key in not screwing it up. My group’s batter was a bit thinner than Bullwinkel’s, a result produced either by not spending enough time pressing the almond meal and sugar mixture through the tamis (pronounced TAM-mee) sieve or not scraping enough air out of the batter before pouring it into the pastry bag.
Other mishaps some groups experienced included undercooked, gooey centers – possibly caused by leaving the oven door open too long – and cracked shells, either from the oven being too hot or from too much air in the pastry bag.
Every detail counts, I learned. But in between the errors were moments of perfection. And no matter how cracked or misshapen the cookies looked, nothing beat the taste of the finished product.
“It’s an art,” Bullwinkel told the class. “But guess what? Only you will know the subtle differences in your success, and everyone else will have their mouths full, saying, ‘Mmm, what’s the problem?’ ”
Which is true, I found, after I repeated the recipe in the Tribune test kitchen. That was the real test, after all. Working alone, of course, took much longer than doing it in a group. It took me three times as long as I thought it would, but I ran into some preventable time-suckers along the way.
My main advice: Get all of the tools. You’ll thank yourself. The time it will take you to run to a specialty store to pick up a tamis – the only tool missing from the Tribune’s test kitchen – will be less than what it’ll take to try to push the almond meal and sugar mixture through a typical wire sieve. My arms and I learned this the hard way.
I took extra care in spending a few more moments with each step than I usually would. I meticulously weighed out each ingredient exactly, not a gram more or less. Just when I thought I scraped the batter against the bowl enough times to push out the air pockets, I scraped a few more times, and found that it dripped in a steadier stream this way. My awareness of time fell away from me. Six hours later, I untied my apron.
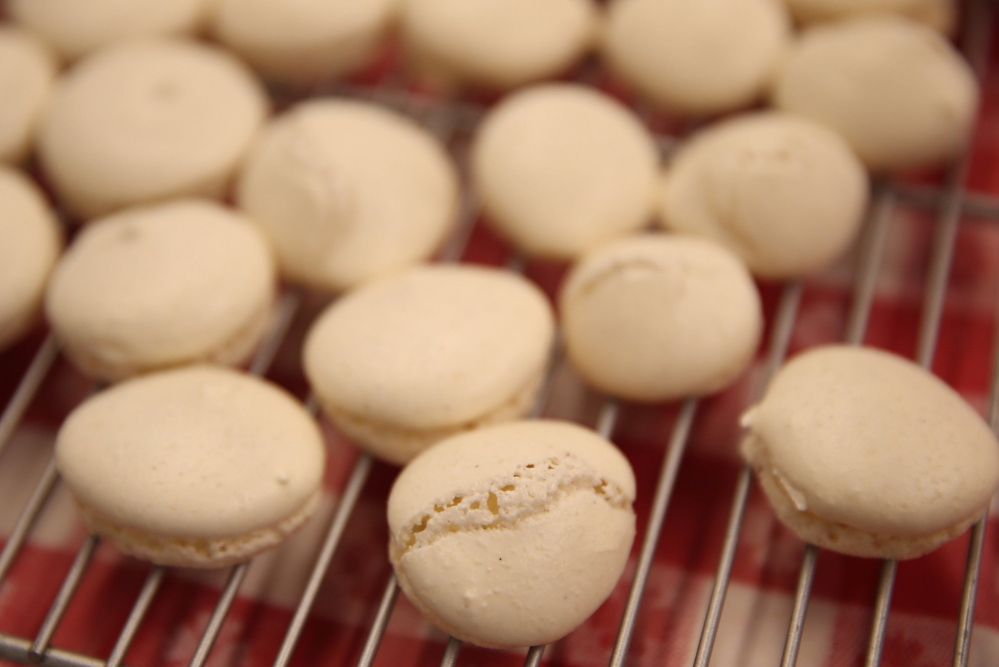
Some shells came out broken and sunken in, but none of them melted off the pan. I arose from the kitchen with sore arms but better off than my first and second attempts – I had macarons to share.
VANILLA MACARONS
(MACARON VANILLE)
Prep: 1 hour | Cook: 30 minutes | Makes: 50 to 60 macarons
Adapted from Madelaine Bullwinkel of Chez Madelaine cooking school. It’s best to weigh out all ingredients on a digital scale before beginning. Because precision is imperative to the process, measurements and instructions must be followed exactly. Modifications or substitutions will only make the recipe harder, not easier. Keep the eggs out on the counter overnight and separate them in the morning.
TOOLS:
Baking sheets
Parchment paper
Food processor with blade attachment
Tamis (see tips)
Curved, hard plastic bowl scraper
Stand mixer, whisk attachment
Large rubber spatula
Large durable pastry bag (18-inch)
#7 or #10 pastry tip
MACARON SHELLS:
250 grams finely ground almonds (almond flour or almond meal), see tips
350 grams confectioners’ sugar
200 grams egg whites, at room temperature (save 4 yolks for the filling)
50 grams granulated sugar (sifted to avoid lumps)
100 grams confectioners’ sugar
½ tablespoon vanilla extract
Distilled white vinegar, for cleaning bowl
1. Heat oven to 300 degrees. Cover 4 cookie sheets with parchment paper. Place 4 more cookie sheets in freezer. (If you have fewer cookie sheets, you can make the cookies in batches, using 2 or more sheets at a time.)
2. Combine almond meal and 350 grams confectioners’ sugar in a food processor with blade attachment. Process for 2 minutes, stopping once to scrape the bottom and sides of bowl.
3. Empty mixture into tamis; use a hard plastic bowl scraper to scrape the mixture through the tamis into a bowl. Add any residual pieces of almond meal that won’t pass through sieve, or else the batter will be too thin.
4. Clean the metal bowl of a stand mixer with distilled white vinegar. Beat egg whites in mixer at level 2 (or low), for 2 minutes. Turn setting to 4 (or medium); add the granulated sugar a little at a time over a period of 1 minute, letting each addition dissolve before adding more. When the whites are thick enough so that the beater leaves a noticeable trace, turn mixer off; add remaining 100 grams confectioners’ sugar. Turn mixer to level 10 (high); beat until the whites have risen and are stiff, about 1 minute. They will appear firm and glossy. Add vanilla; beat briefly to mix.
5. Remove bowl from stand; fold in ground almond mixture in three additions with a large rubber spatula.
6. With a curved plastic scraper, repeatedly smooth the batter up along the side of the mixing bowl to work out air pockets: Starting with the scraper at the bottom of the bowl, lift the batter up from the bottom center, pushing it into the sides as you go. Continue to scrape the sides of the bowl, pushing the batter back down, and then up again. You want to apply firm pressure to get the air out. When the batter looks smooth and falls from the scraper in a steady stream, it is the proper consistency. This may take longer than expected. The batter will go from looking fluffy and airy to being thicker, with no bubbles.
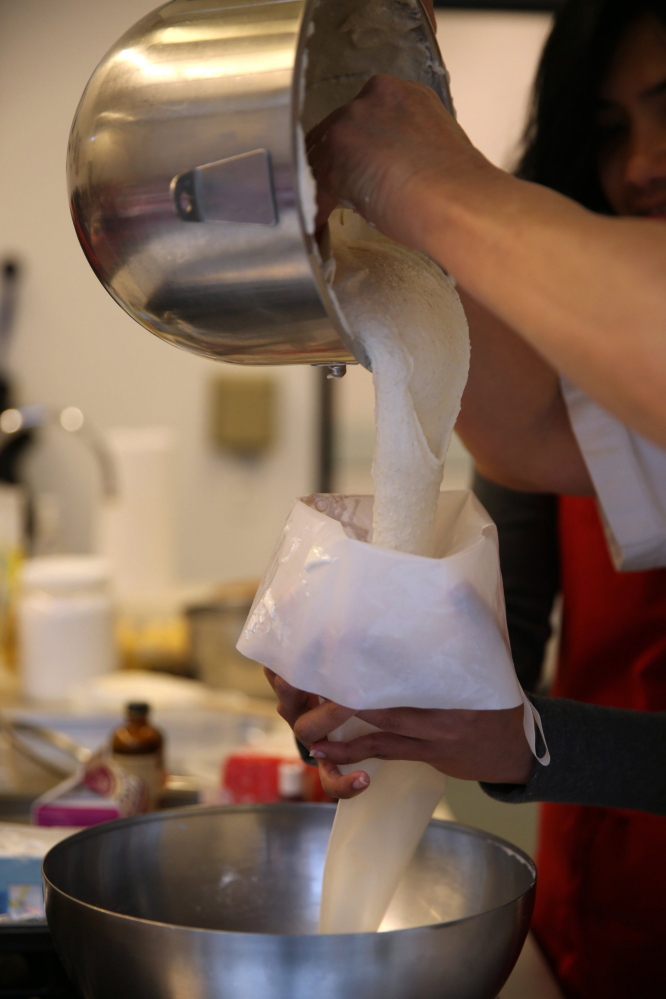
7. Fit a #7 or #10 pastry tip inside the pastry bag. Twist the bag right above the pastry tip and push the twisted portion into the pastry tip so the batter won’t drip out. Scrape batter into bag. (If working alone, stand bag in a tall empty beer glass.) If your pastry bag is not large enough to hold all the batter, do this in batches. When it’s full, twist top of bag and turn over in the ball of your hand.
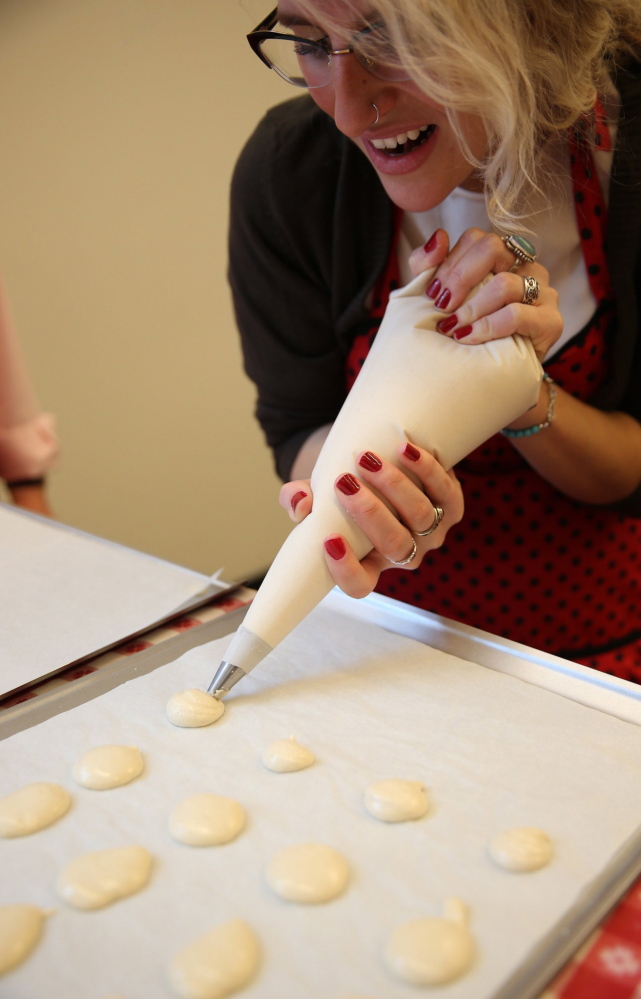
8. Dot corner of cookie sheets with a little batter to anchor parchment in place. While holding bag from the top, hold tip close to parchment, squeeze from the top of the bag, counting to 5 to form 1½- to 2-inch circular cushions of batter. When squeezing, do not move bag or raise tip from parchment. At 5, stop applying pressure, and twist in a quick motion of the wrist. Repeat to fill the baking pans with macaron shells. Frequently, stop to push batter down in the bag with the scraper to avoid air pockets.
9. Bake macarons, 5 minutes at 300 degrees. Turn the heat down to 250 degrees; bake another 15 minutes. The batter will have risen and the tops will have a smooth, firm surface. The macarons are done when they do not move when pushed lightly from the side with a finger. Remove the macarons from the oven.
10. To chill the bottom of the macarons and stop them from overcooking, first remove cookie sheets that are in the freezer. Slide parchment with macarons onto a cold sheet and let it rest, 30 seconds. Then slide parchment onto a cake rack to cool completely. Repeat with remaining parchment sheets full of macarons. When the macaron shells are thoroughly cooled, loosen them one by one. Then fill.
VANILLA BUTTERCREAM FILLING
You will have extra frosting for another use. It freezes well.
TOOLS:
Thermometer
Stand mixer, paddle attachment
Decorating bag
FILLING:
140 grams whole milk
60 grams granulated sugar
1 vanilla bean, seeds and pod, see note
60 grams egg yolks (about 4 large)
60 grams granulated sugar
400 grams unsalted butter (3½ sticks), cut in 2 tablespoon pieces
1. Heat milk to a simmer in a saucepan with 60 grams sugar and the vanilla bean seeds and pod until a skin forms. Stir together yolks and 60 grams sugar in a small bowl. Stir hot milk into yolks a little at a time so that the eggs don’t curdle. Remove vanilla pod; transfer custard mixture to a clean saucepan.
2. Heat liquid over medium-low until it coats the sides of the pan (it should be about 180 degrees). Pour custard into a mixer bowl; beat on medium until it cools to 86 degrees. Beat in soft butter 2 tablespoons at a time. Set aside in a cool place until ready to use.
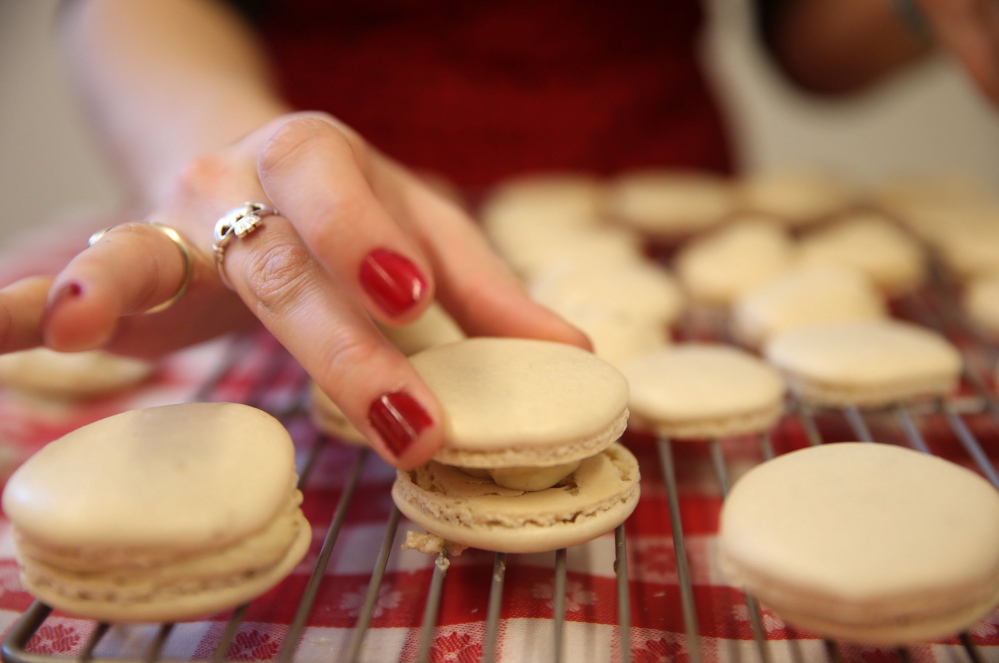
3. Spoon buttercream into a decorating bag. For each macaron, squeeze a 1/4-inch thick layer of filling over 1 macaron shell. Cover with another macaron shell. Repeat.
NOTE: To remove the vanilla seeds from the pod, slice the pod open along its length with a very sharp knife. Spread the pod open.
Holding it flat against a cutting board, use the back of the knife to scrap out the seeds. You will use the seeds and the pod in this recipe.
Send questions/comments to the editors.


Comments are no longer available on this story